
Assortments, prices, and labels
Available in: 🌐 Web · 🖥️ Desktop
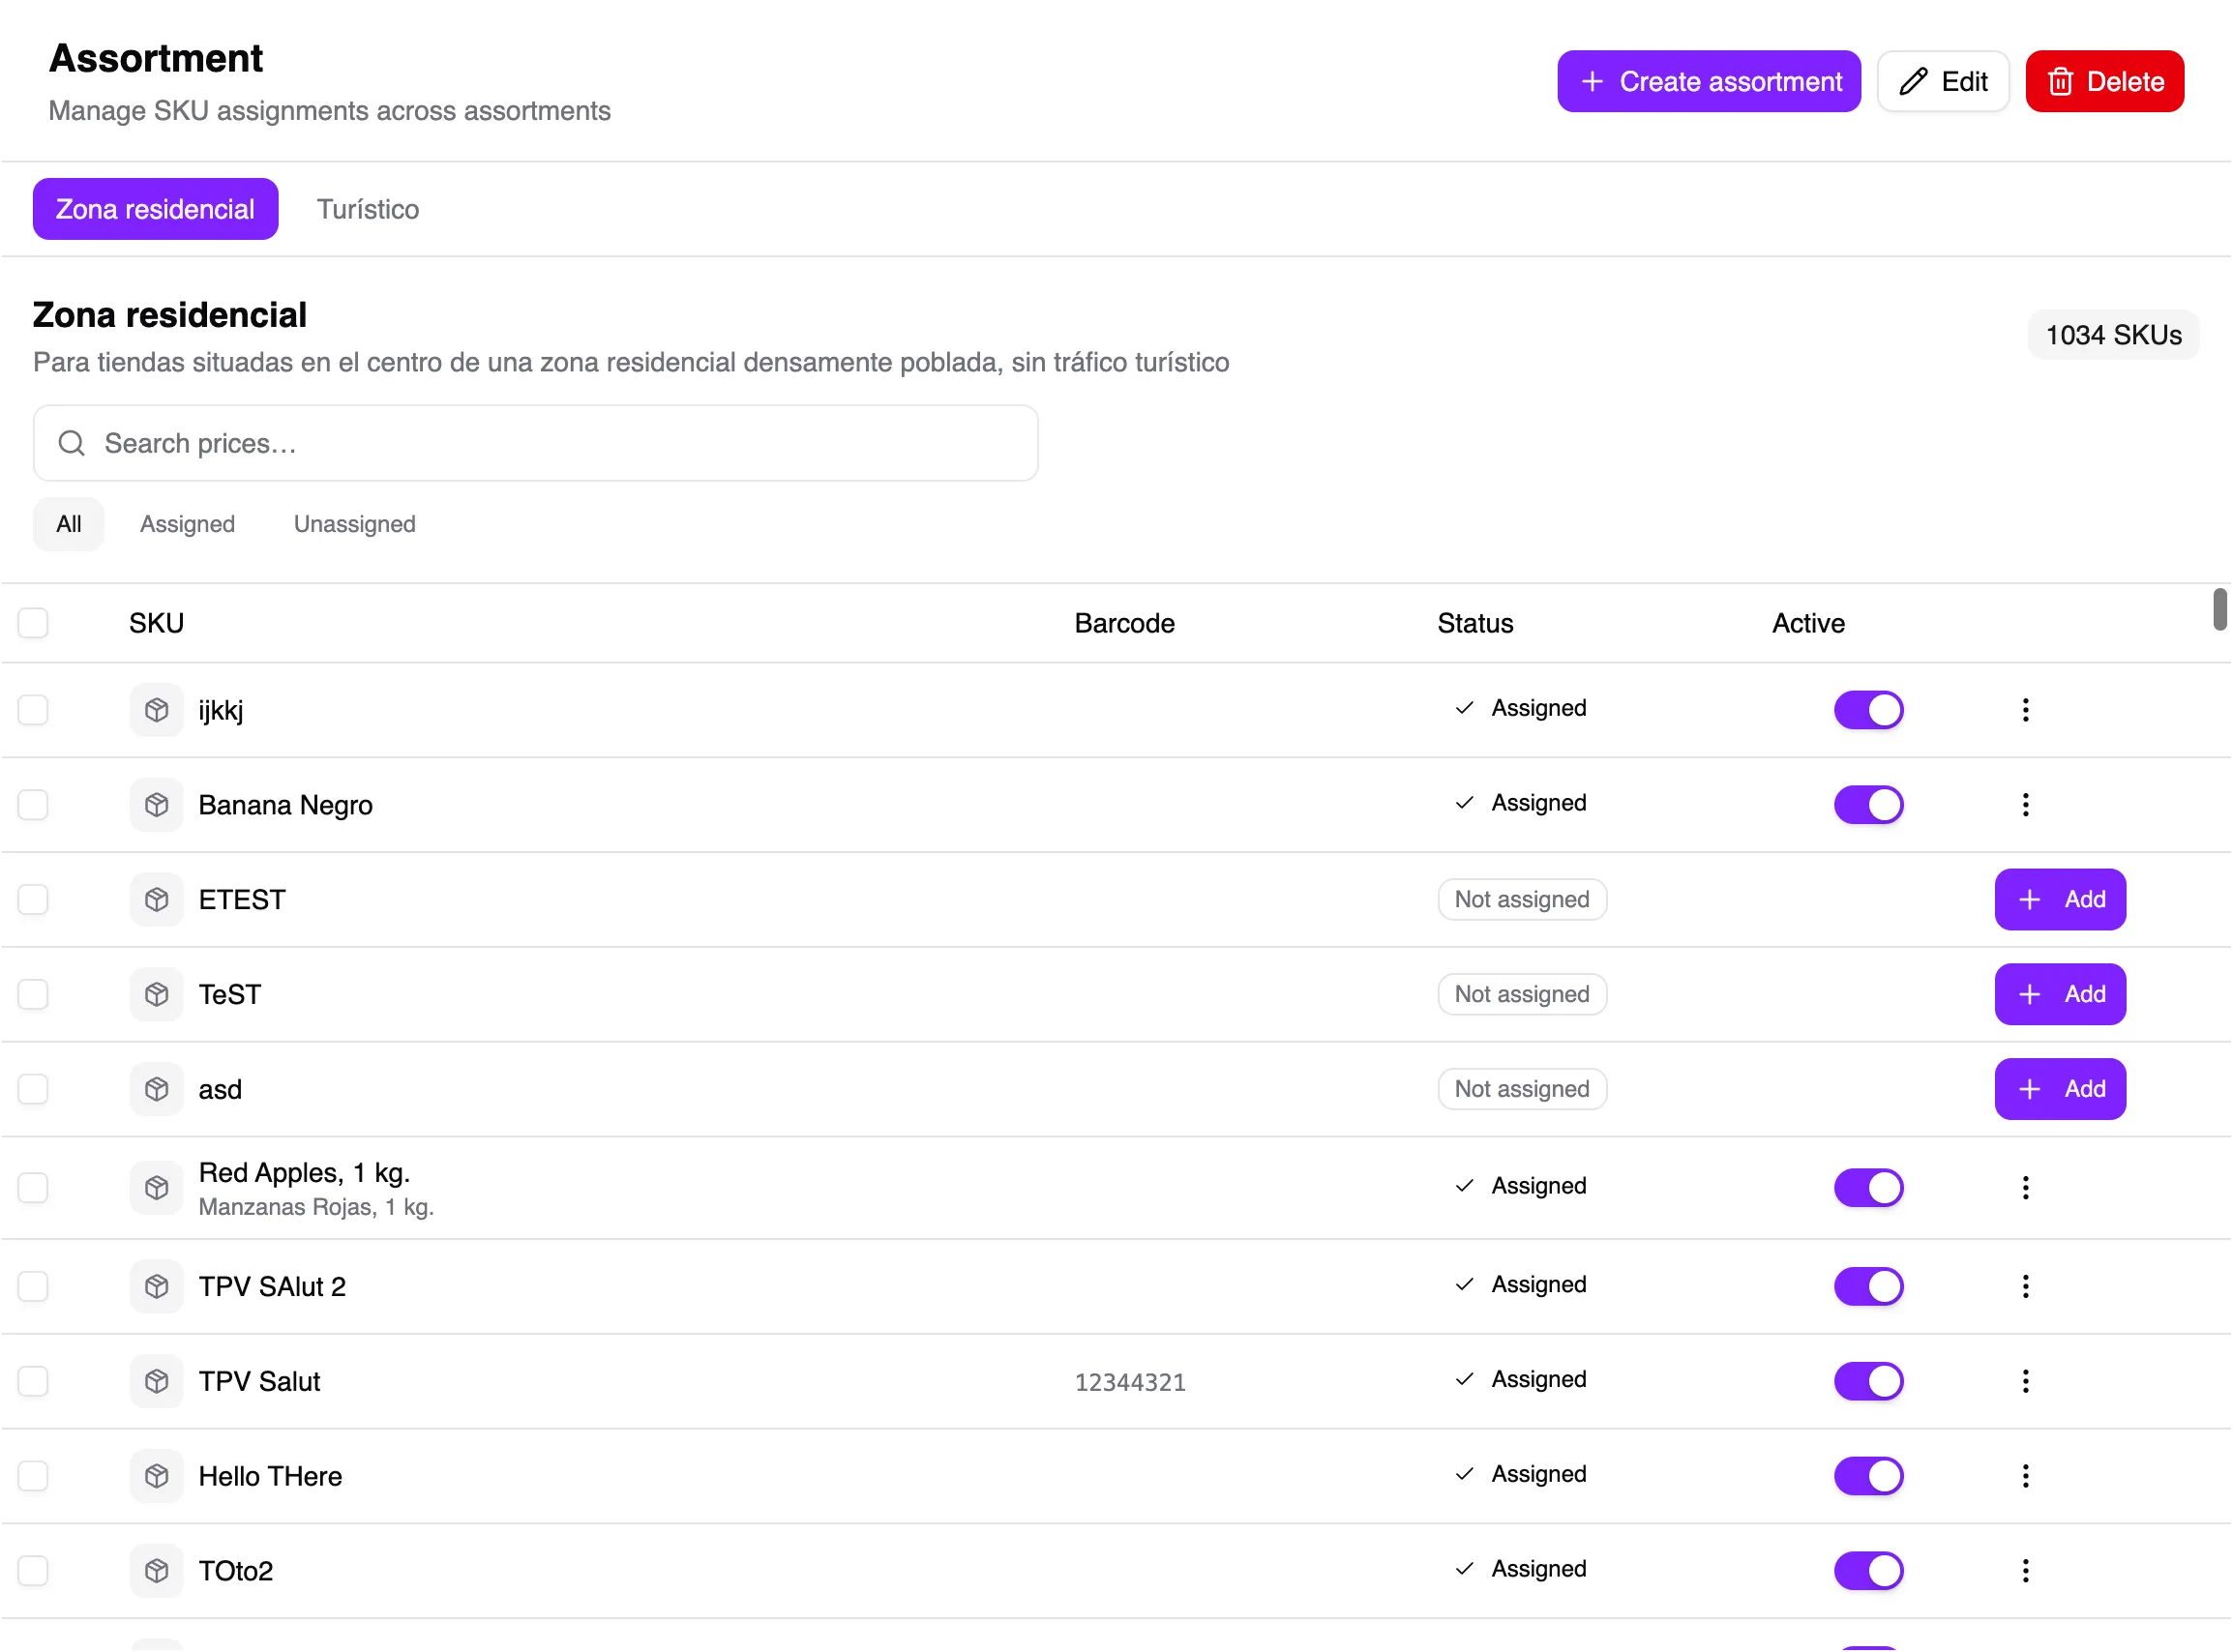
An assortment contains the SKUs a store can sell. A price list defines what each costs. A store needs both before a product is ready to sell in the POS.
Prepare the assortment
Section titled “Prepare the assortment”- Open Assortments and create one with a name that identifies its purpose.
- Add the SKUs the store will sell and save.
- In Stores, assign the assortment to the relevant store.
Set prices
Section titled “Set prices”- Open Price lists and select or create a list.
- Find each SKU in the assortment and enter its sale price.
- Check tax and unit before saving.
- Assign the list to the store.
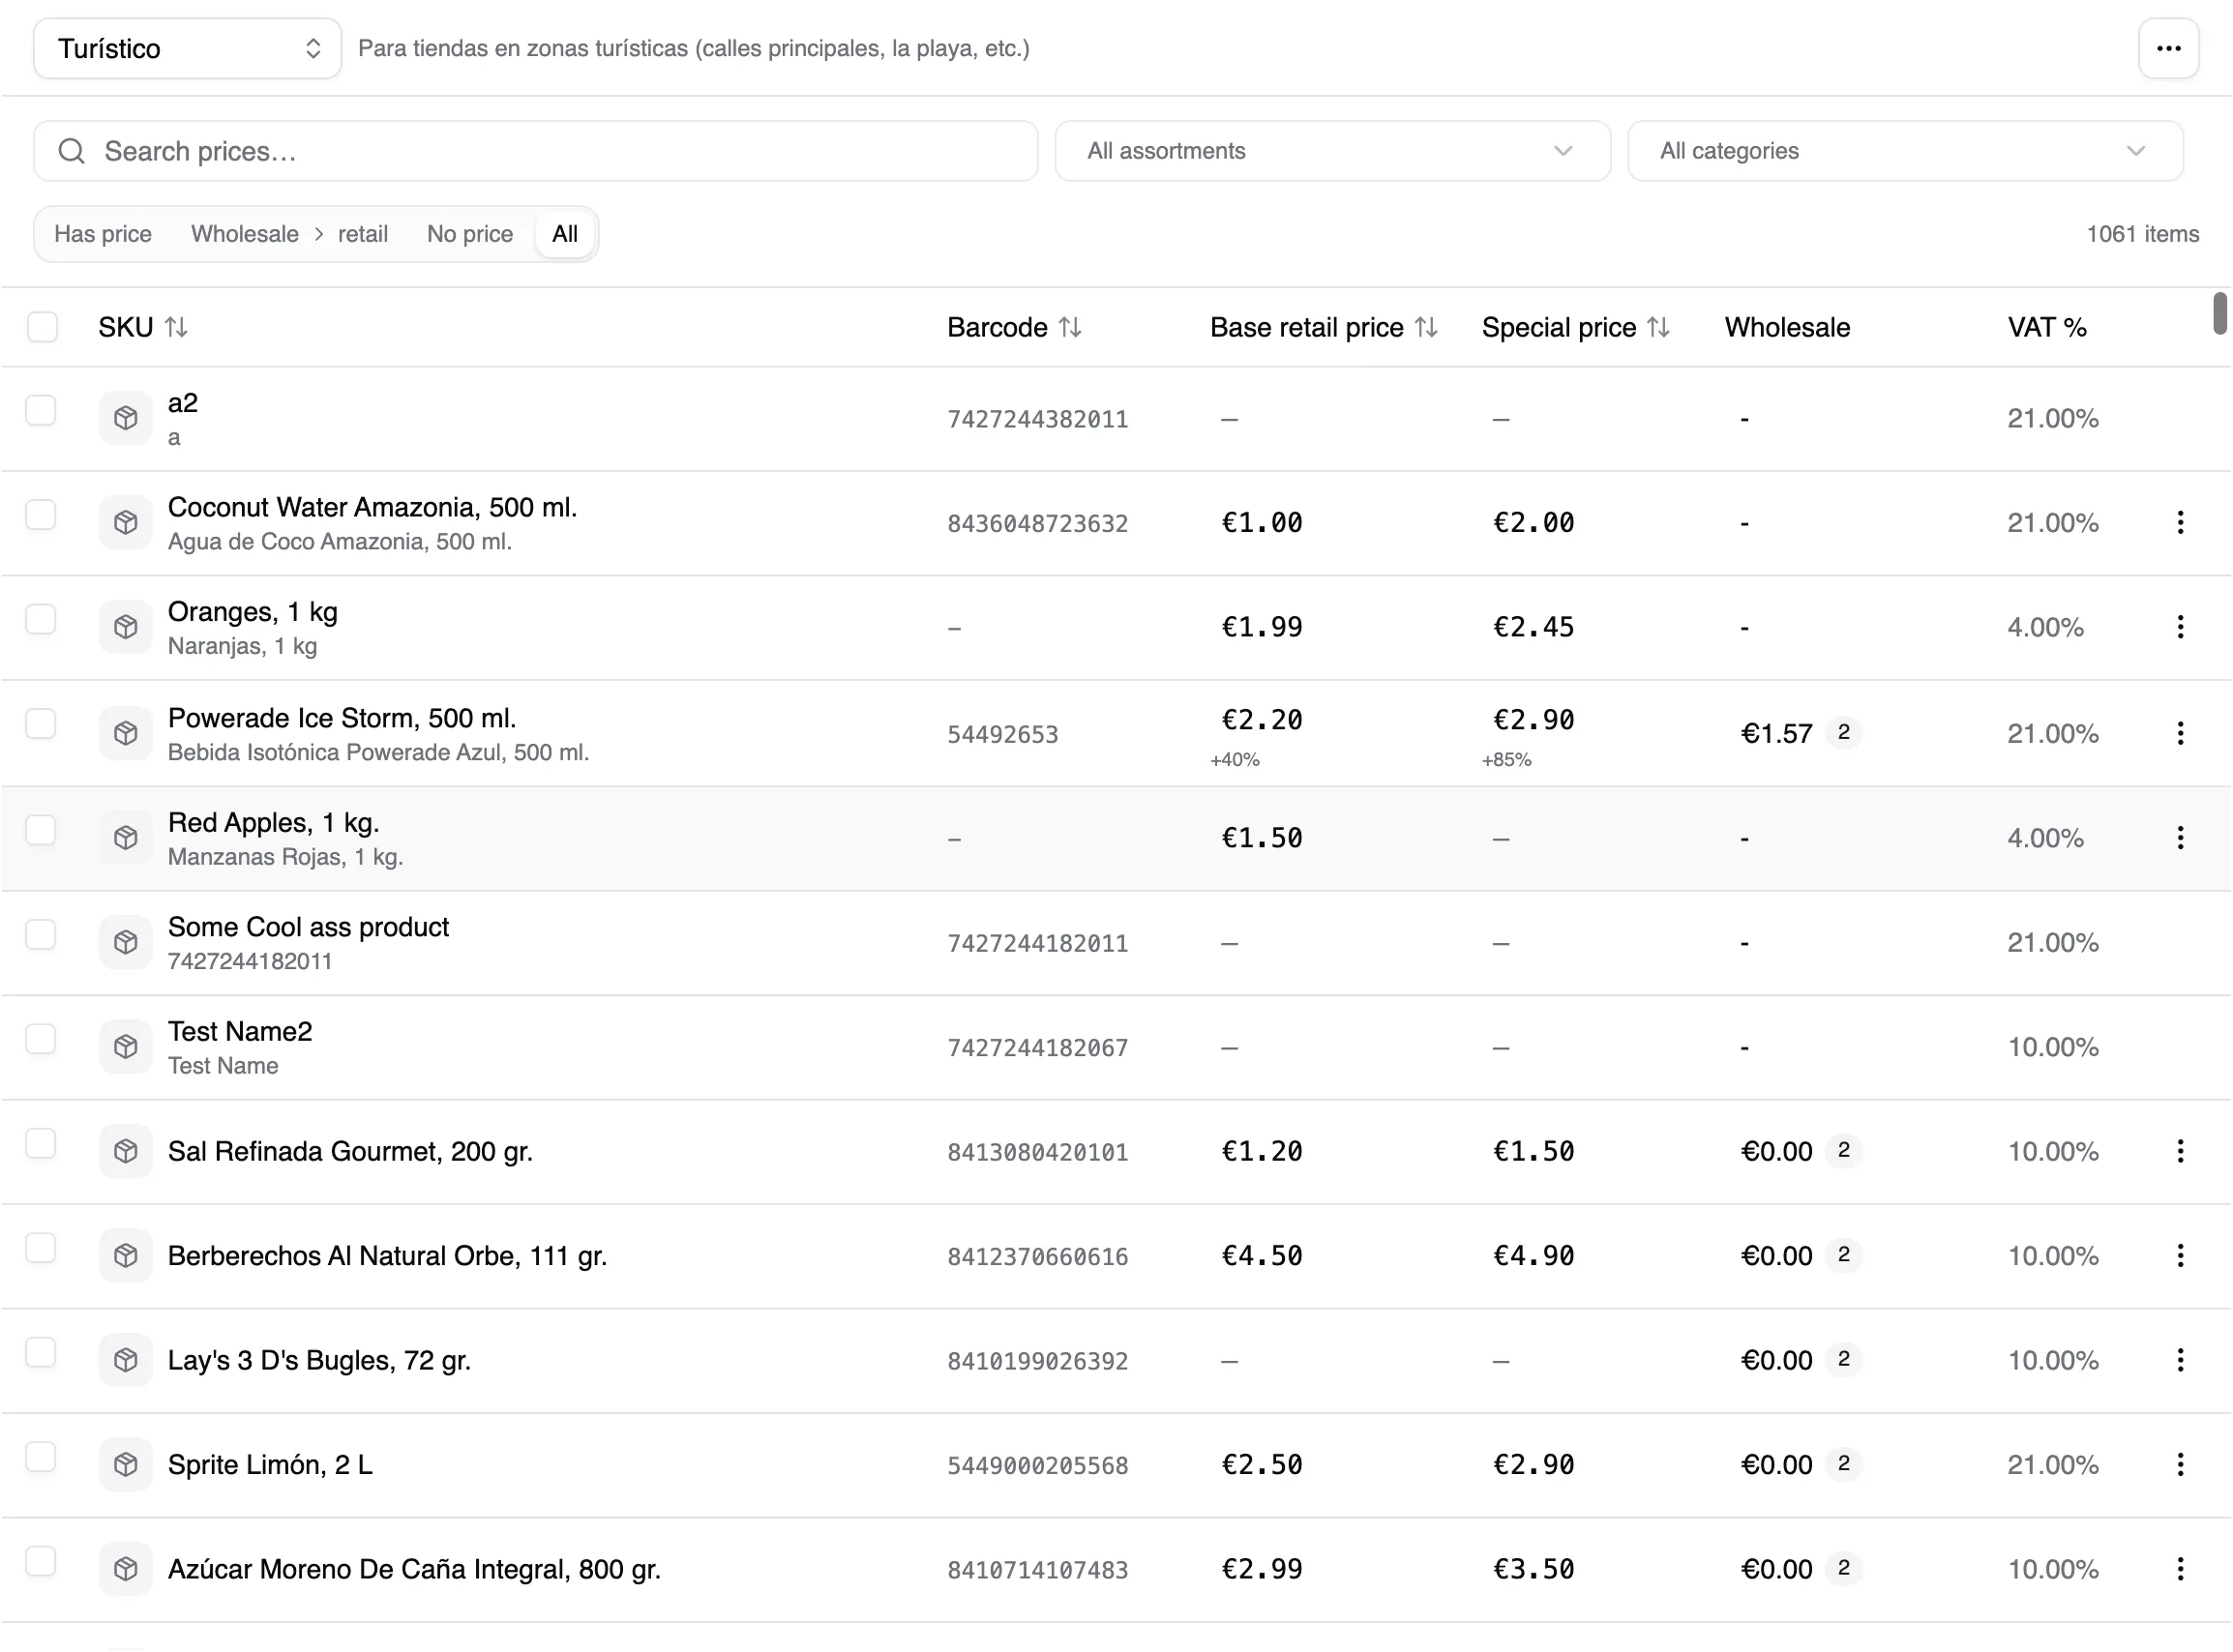
For a weighed product, the price is for the displayed unit. In the POS you can enter the first price inside the weighing dialogue; every weighed selection goes through verification before entering the cart.
Print labels
Section titled “Print labels”Select the products, open the label action, check format, price, and quantity, then print. Print one test label first to confirm size and alignment.
If a product is missing from the POS, check in order: active store, assortment membership, price, and connection. See Troubleshooting too.